When running an adventure, having a good map is essential. If you are using miniatures, then with a quick bit of printing, you can have terrain for your players. Maps can seem daunting, but if you set up a basic map ahead of time, you can quickly produce maps for your adventures.
There are plenty of great programs out there, and I have tried Dungeon Mapper and others, but I have fallen back to using Adobe Photoshop with a collection of sprites and textures to aid in my map creation.
“But Photoshop is expensive!”
Well, it used to be. Now, you can subscribe to it for only $9.99 a month, which is pretty inexpensive for the powerful tool you are getting. If that is still too expensive, you can find an older version for free from Adobe.
Set Up Your Document
Ok, so now that you have a version of Photoshop, here are the steps I have taken to create a basic map. If you want an easier way to get a template, click here to download my template from the SagaBorn store. The zip file also includes some floor textures I have made, as well as some of my sprites.
If you want to make your own, you will first set up your image. I make mine large so I have plenty of room. I start by creating a 30”x40” image at 200 DPI. I use a high DPI so I can print out the full-size map later with no blurriness.
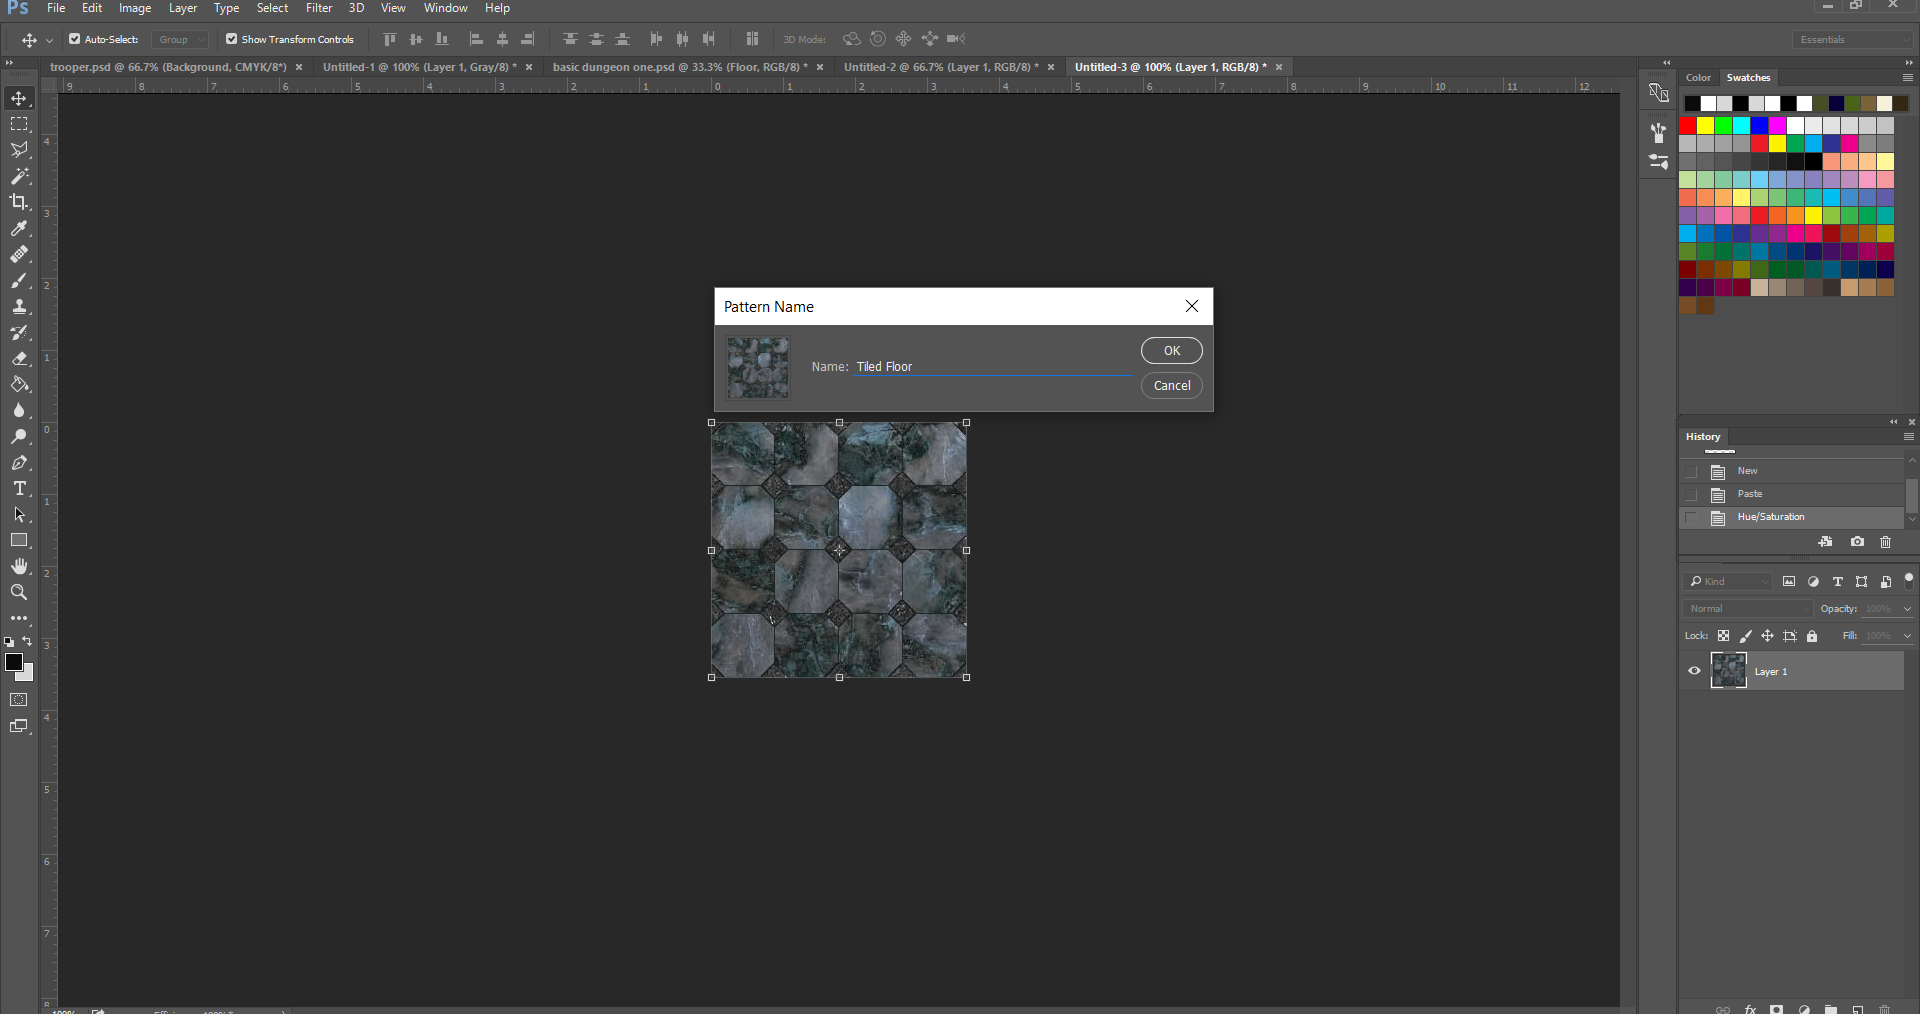
Define a Pattern from a Texture
Next, you will need to import some textures to use in your map. I provided some in my file, but you can also go to GoodTextures.com and browse their library for more. To import a texture, open it in Photoshop, find Edit/Define Pattern, give it a name and click OK.
Now you have a pattern.
Make a floor layer
Make your first layer and fill it with any color you like. Next, add an FX layer by clicking the fx button at the very bottom right in the layer panel. Choose Pattern Overlay from the Blending Options, set the Blend Mode to Normal and 100% opacity, choose the texture you just created by clicking on the icon displayed to the right of the word “Pattern,” then click on the desired texture icon.
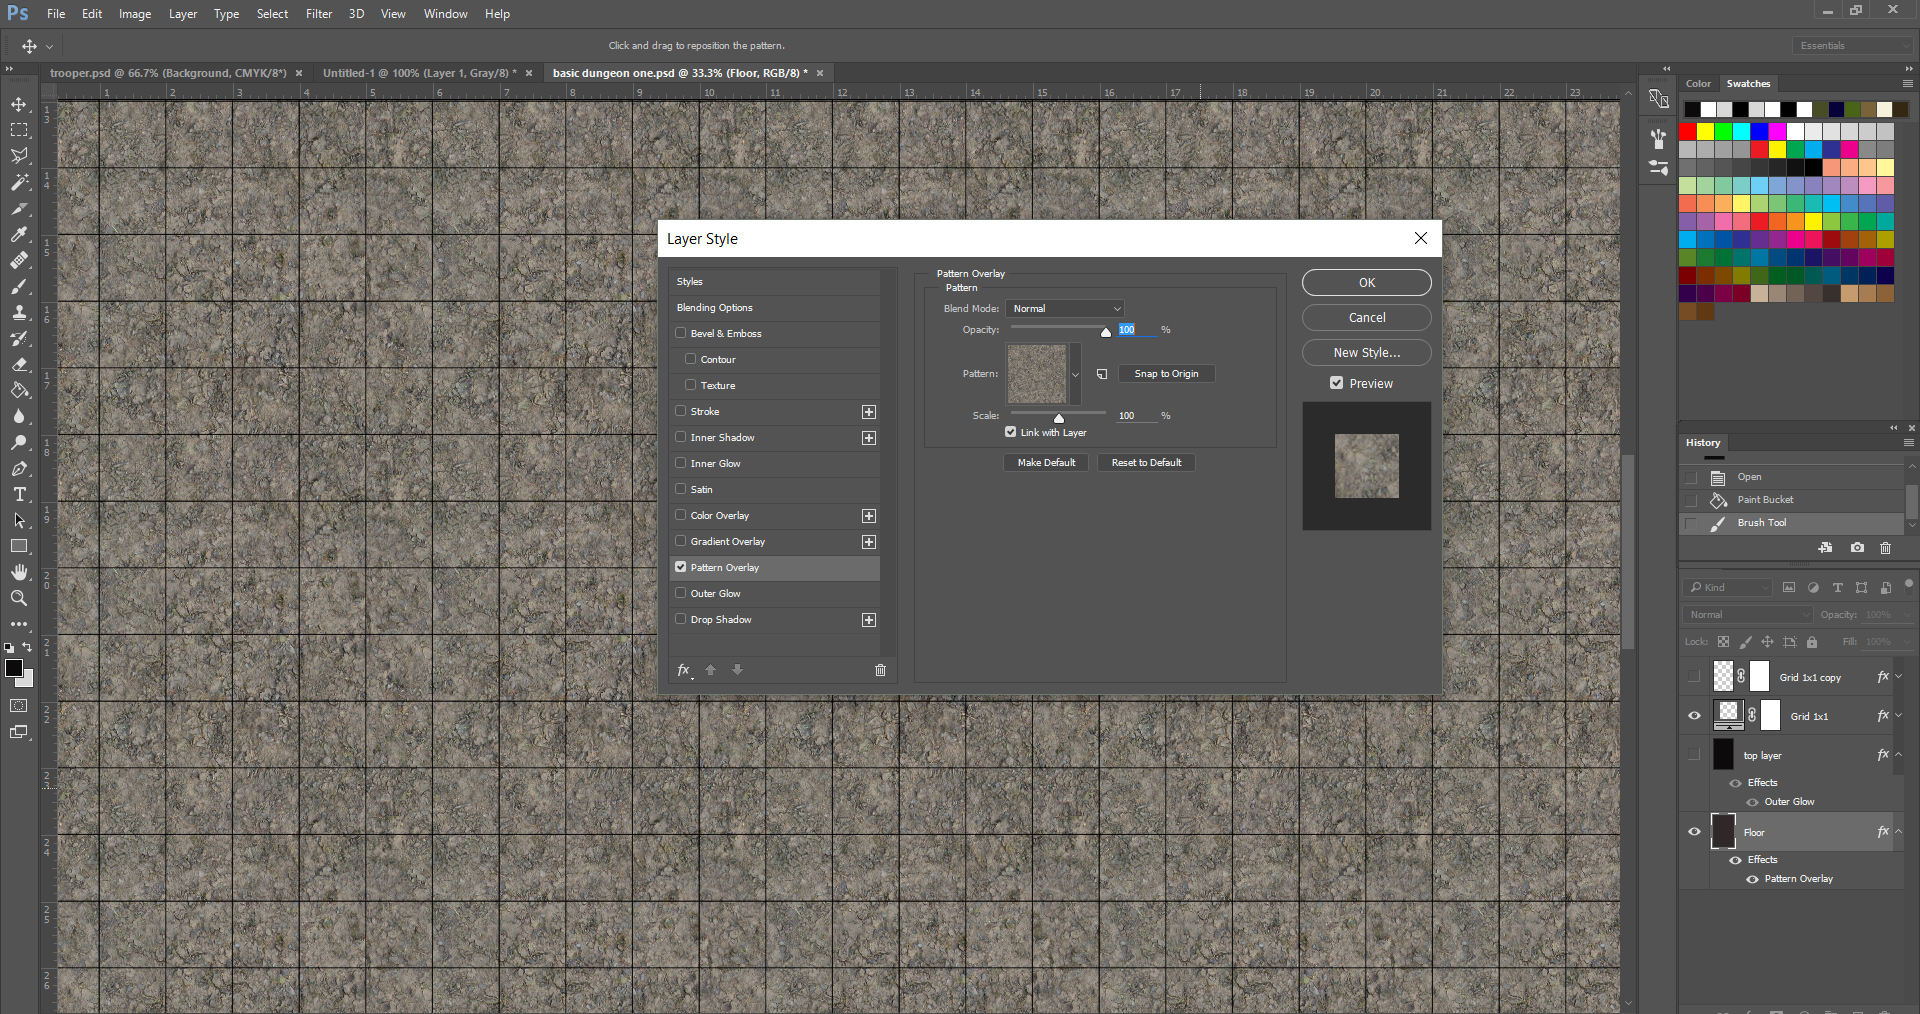
Now you have a dungeon floor. The next question is: do you need a grid or not? If you want a grid, my file has a layer named grid 1×1, so just repeat the above steps to add your dungeon floor to my template. If you don’t need or want a grid skip ahead.
Add a Filled Layer to Carve Out the Dungeon
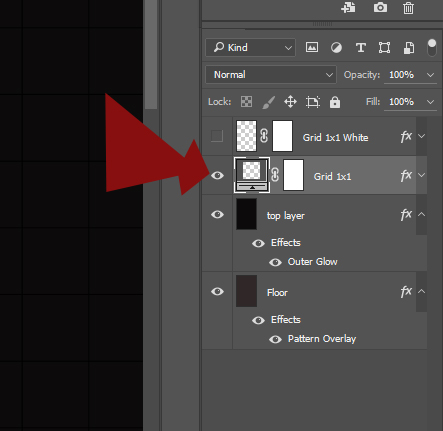
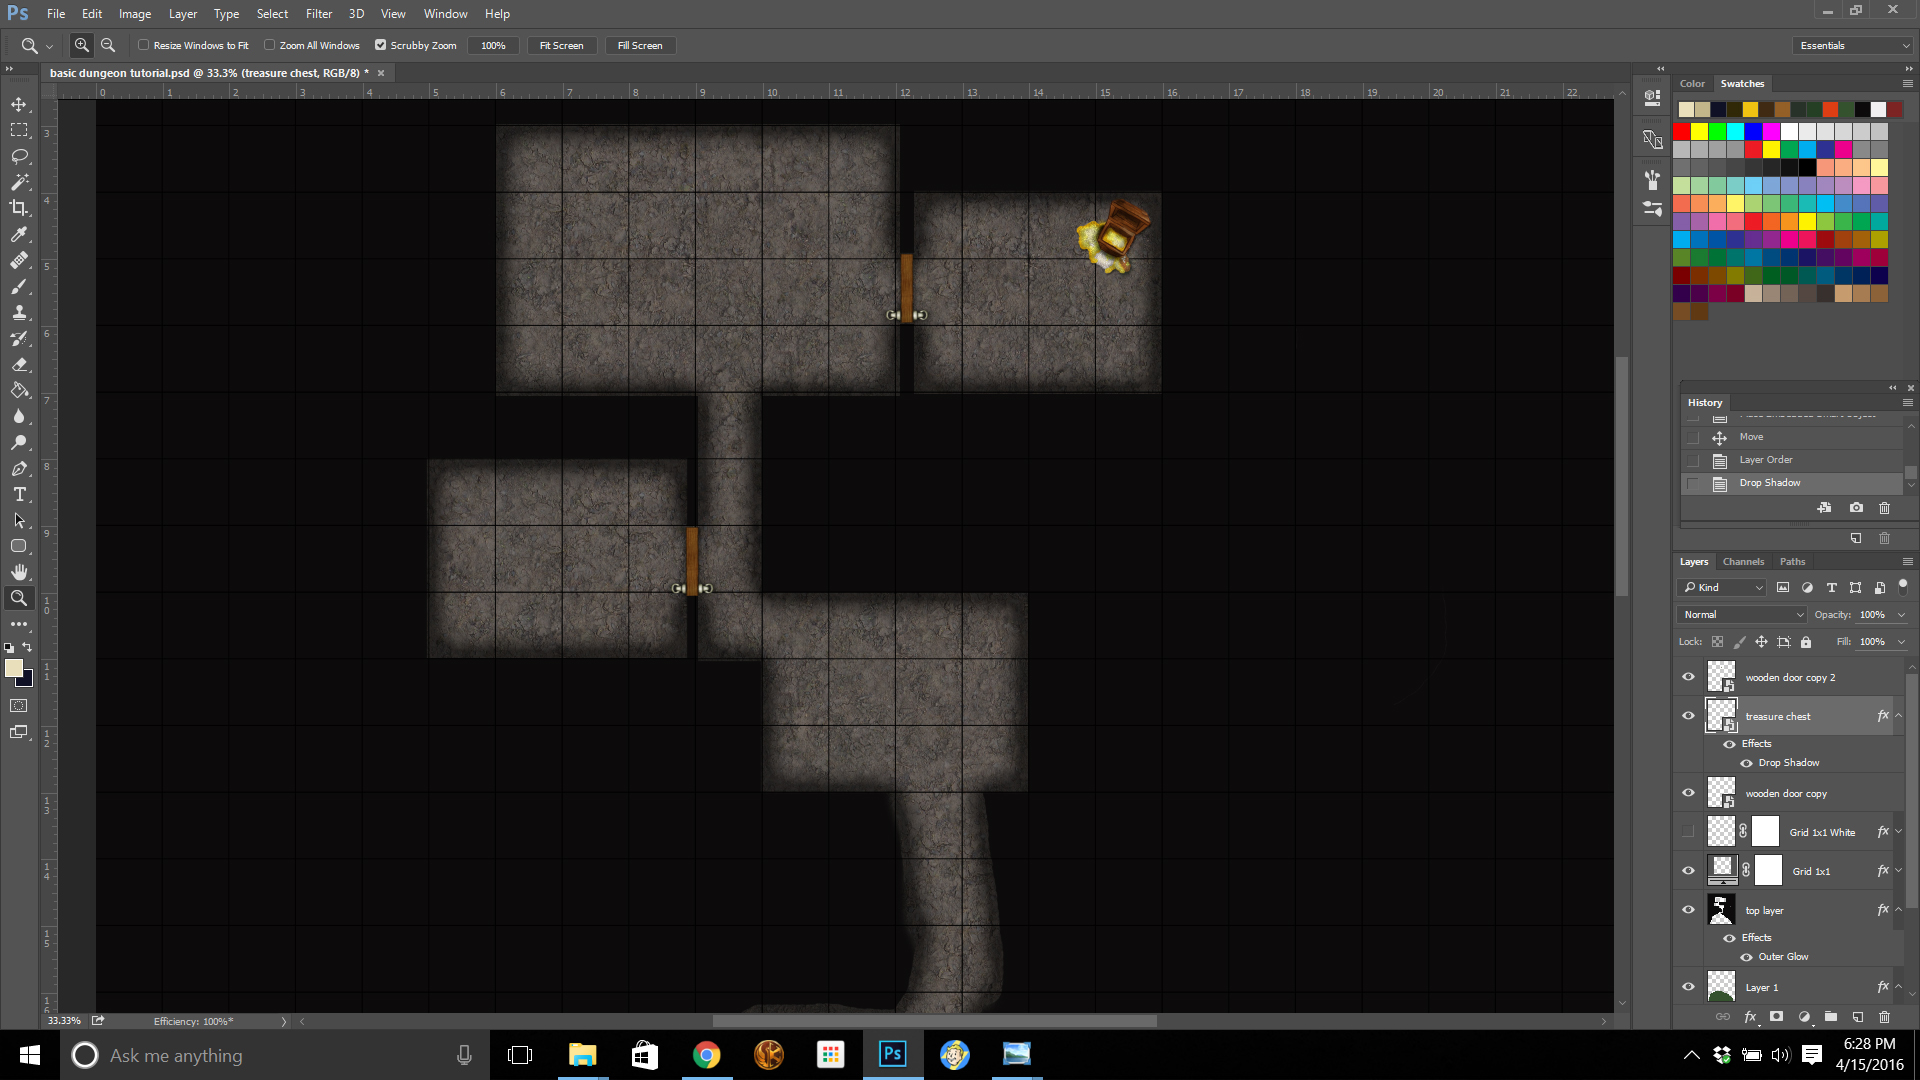
Next is the upper layer from which you will carve your dungeon. In my template, this is named “top layer”. Make this layer visible by clicking the eyeball icon shown in the image below. You can fill this layer with any color you want. I chose black since this will be an underground dungeon.
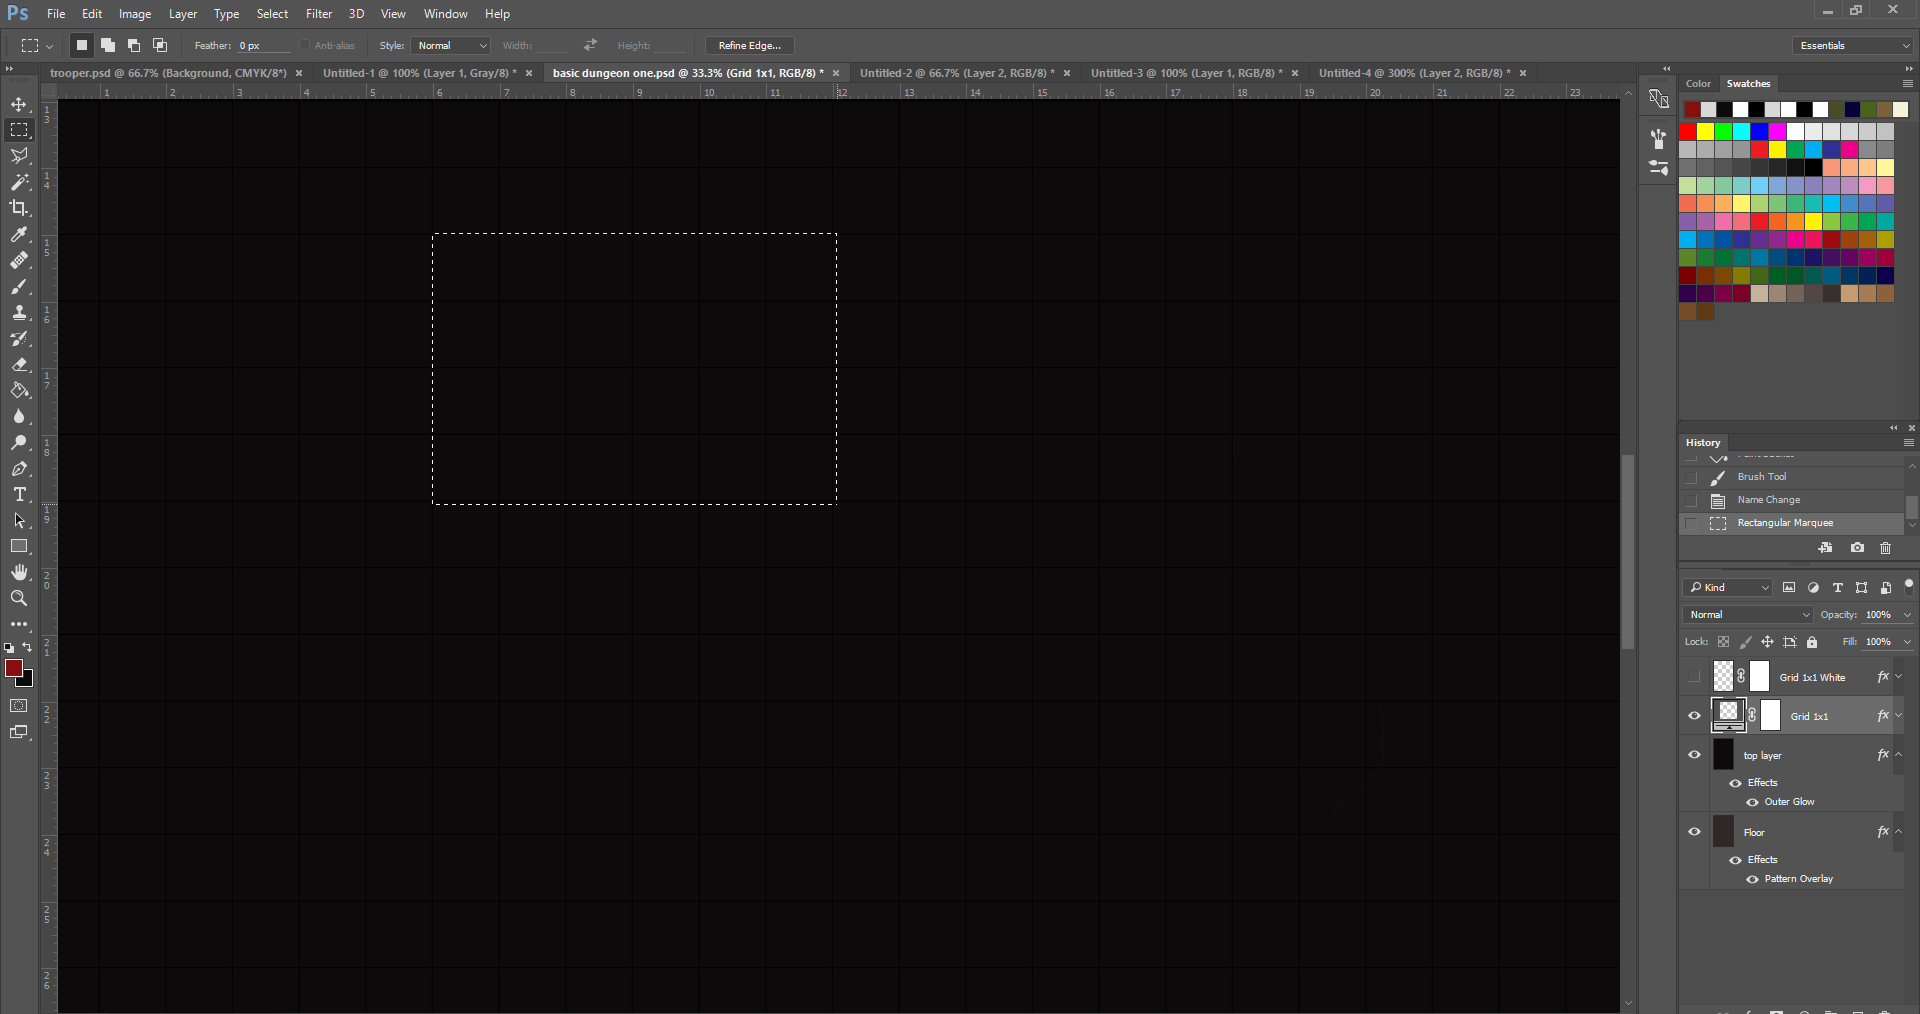
Now we begin to carve out our dungeon. I want a 20’x30’ starting room, so I use the selection tool and select 4×6 squares (5’ square rule). After I have made my selection, I make sure I am on the “top layer” and hit the Delete key on my keyboard—and bickity bam, I have a room!
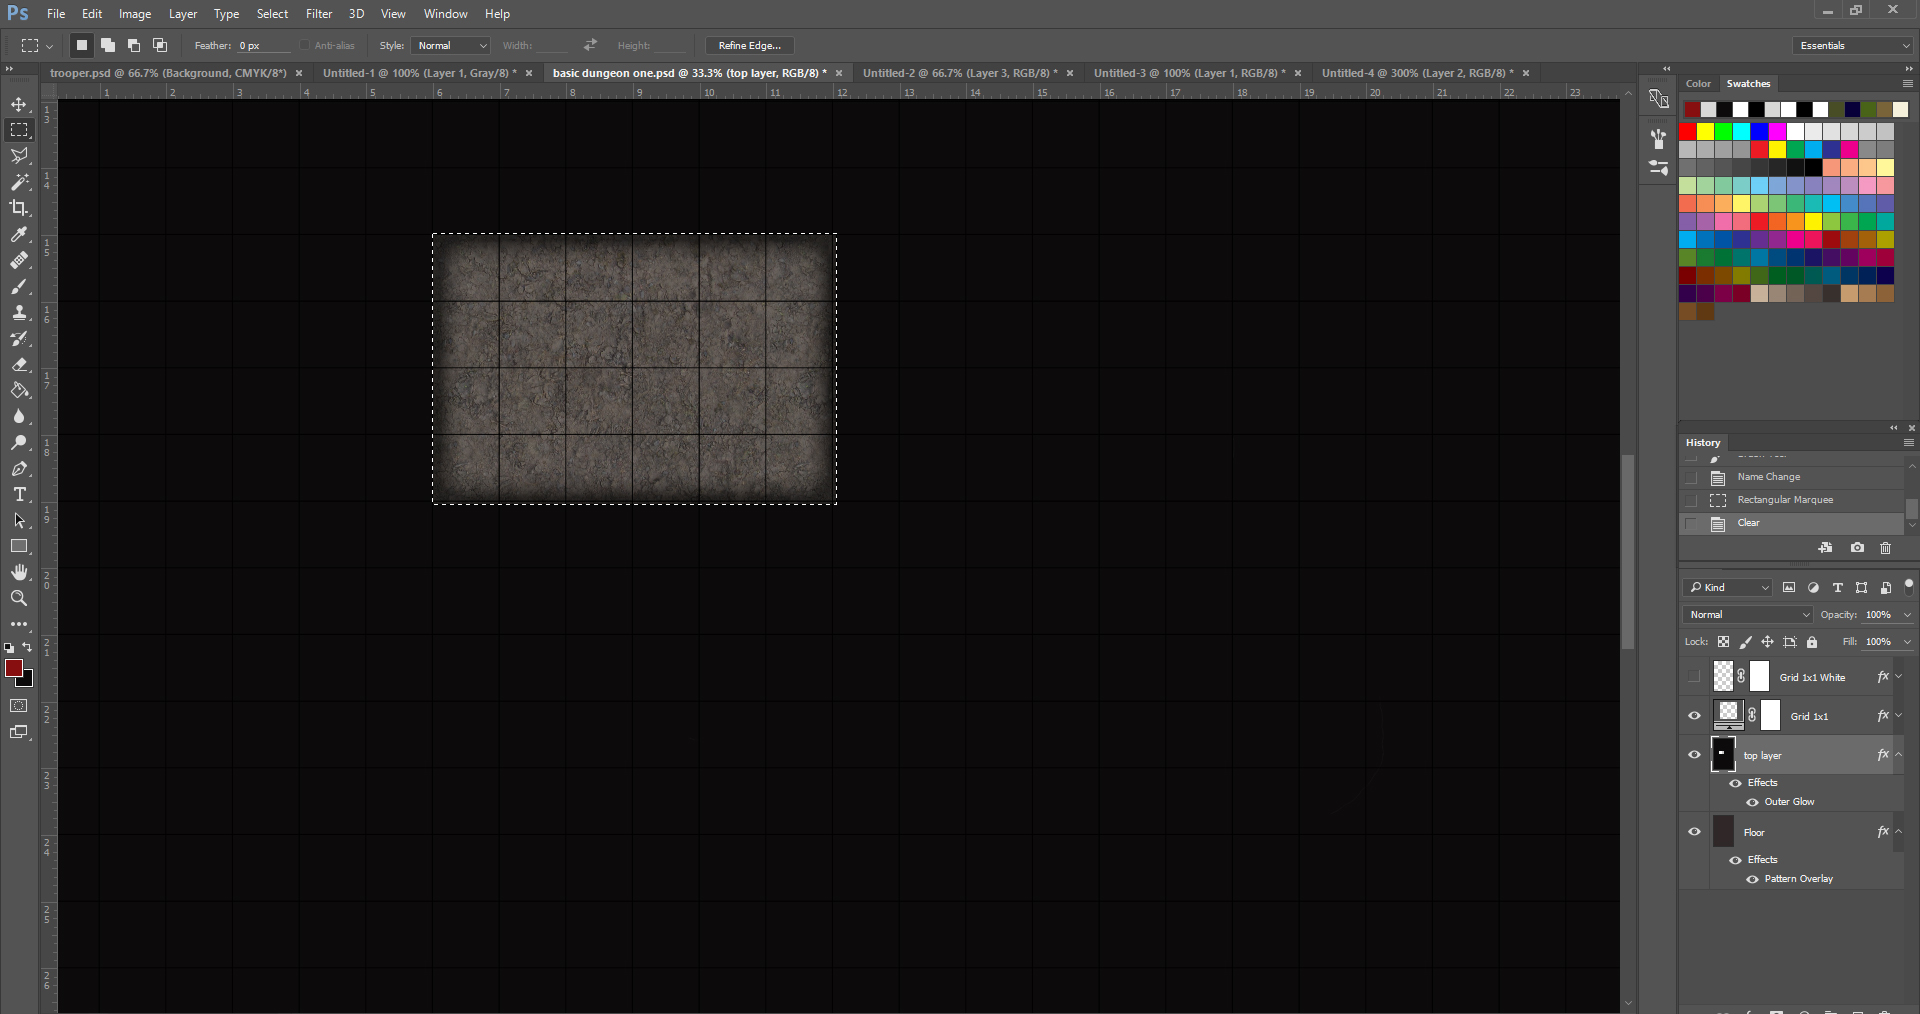
In my template, I have already applied drop shadow and outer glow to the layer, which gives it a shadow effect. If you don’t like this, or want to adjust it, you can do so in the FX layer panel.
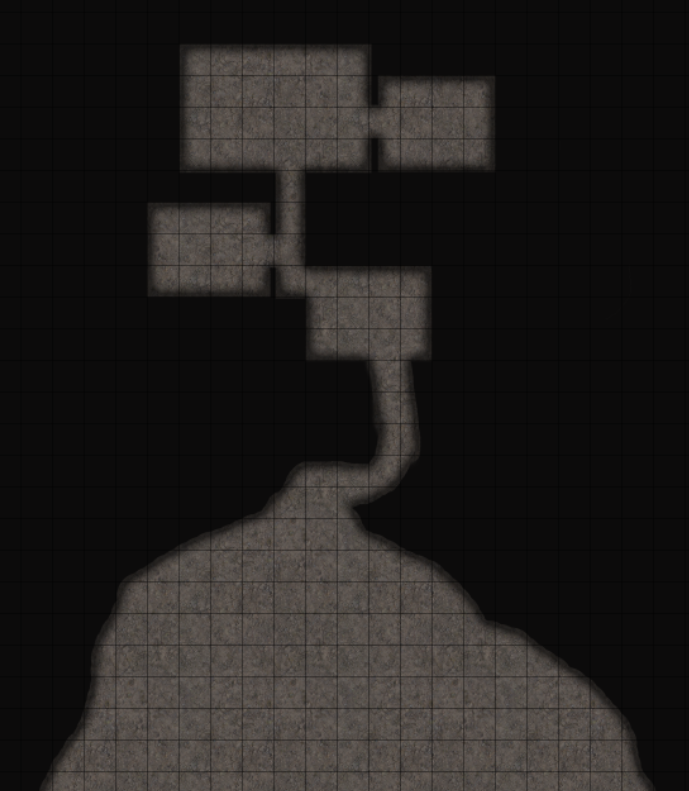
From here, keep selecting and deleting until you have built a basic dungeon. You can also use the erase tool to create areas that are not square.
Add Other Textures
In the section that is not square, I created another layer, painted a section, and filled it with a grass texture to make an entrance to my dungeon. (Hint, you need to have paint on the layer for the texture to show up. It won’t show in any transparent areas, so filling the layer will make the texture show up everywhere, but you can just paint on areas that you want to show the texture, as I did.)
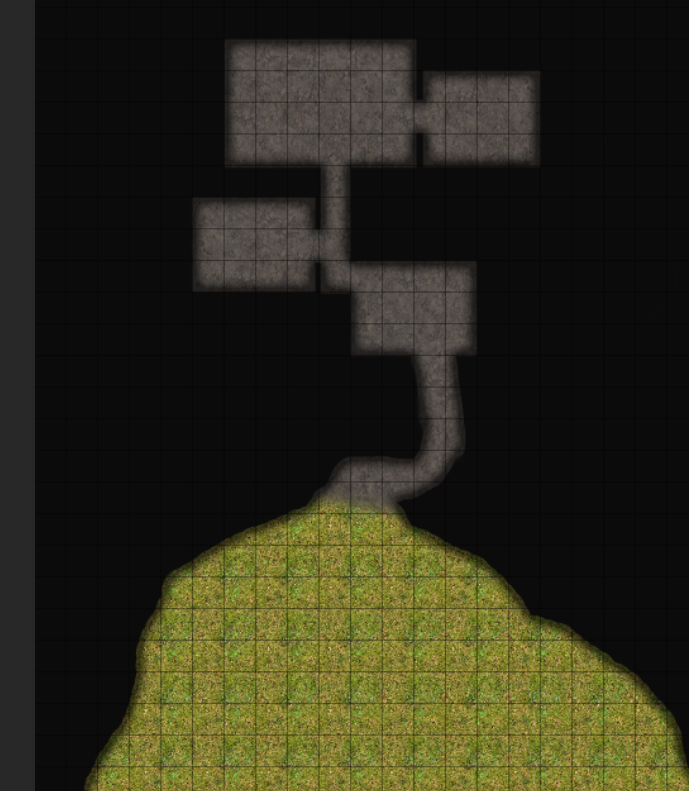
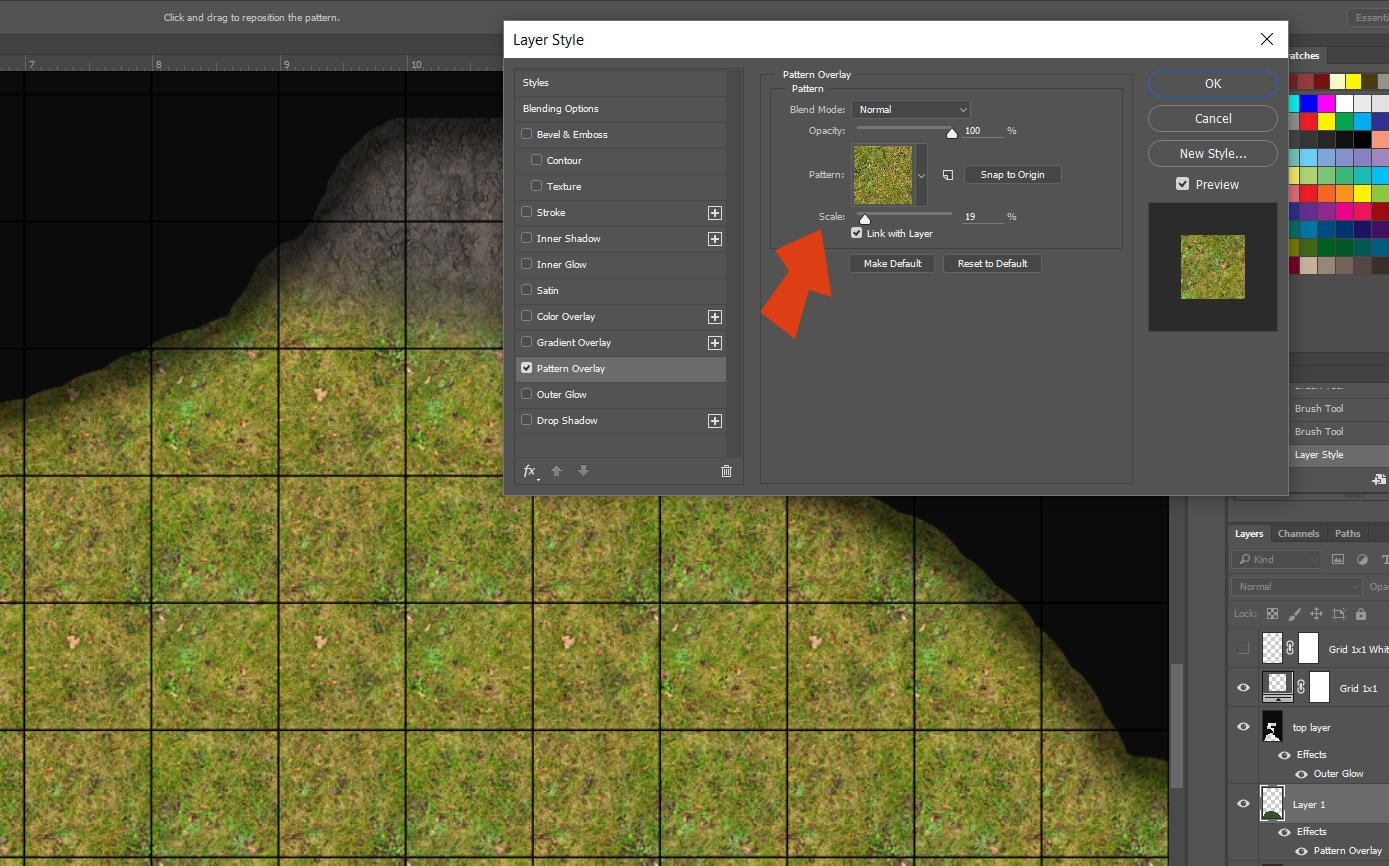
When adding a texture to your dungeon, make sure it is scaled to your map. Under FX controls, you can adjust the scale of the texture as indicated in the image below. (Tip: to re-open the FX controls, just double click on the words Pattern Overlay in the layers panel under the effect that you applied to the grass layer and it will open the Layer Style dialog as shown below.)
Add Tokens to your Map
The basic dungeon floor plan is finished, so now it is time to add some tokens. If you are creating a printable map, you can add the tokens in Photoshop. If you are using Roll20 to run an online game, you can add your tokens inside the Roll20 program.
In newer versions of Photoshop, all you have to do is drag and drop the token files to the map and Photoshop will create a new layer, naming it to match the token’s file name. A more formal way to import the tokens, which will work in older versions of Photoshop on both PC and Mac, is described below.
To import your icons/tokens with pretty much any version of Photoshop and have it automatically name the new layers for you, do the following:
- Select the topmost layer in your layers pallet.
- Then select File->Place, which will open the Place dialog.
- Navigate to the location of your icon files via the Place dialog.
- Select the icon (.png file) you wish to place and click the Place button (or just double click the icon).
- This will import the icon, place it above the layer you had selected, name the new layer the same name as the icon’s filename, and put you into Free Transform mode so you can resize it as needed (see image below).
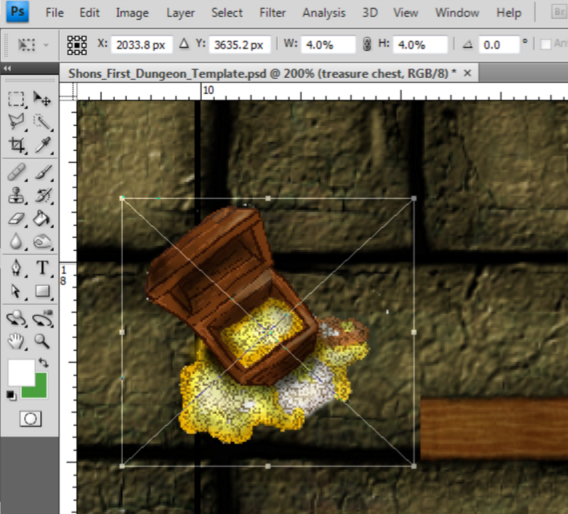
Resizing the Token
You can click and drag any of the resizing handles to resize the token as needed, or you can type Width and Height percentages directly into the “W” or “H” fields on the toolbar. To lock the proportions, you can click on the little chain link lock symbol on the toolbar (between the W and H fields) or just hold down the Shift key while dragging. (You can also hover the cursor over the W or H and wait for the cursor to change to a finger, then click and drag left or right to adjust the numbers.)
Rotating the Token
To rotate the token, you can hover the cursor just outside any corner handle and wait for it to change to an arc, then click and drag, or you can type values into the rotation field on the toolbar (to the right of the triangular symbol). Alternatively, you can hover the cursor over the triangular symbol itself and wait for it to change to a finger cursor, then click and drag left or right to adjust the angle.
Moving the Token
To move the token around on the screen, simply click and drag anywhere on the icon. You can also make precise adjustments by entering values in the X or Y fields in the toolbar, and you guessed it—you can also hover over the X or Y to get the finger cursor and click and drag to adjust the values. For fine adjustments, you can use the four arrow keys on your keyboard to move the token a pixel at a time, or hold down the shift key while pressing the arrow keys to move larger distances.
Once the icon is sized, rotated, and placed where you want it, hit the ENTER key to accept the changes, and the transform cursor will go away.
Make sure your tokens are the topmost layers and all have names that you recognize.
Moving or Resizing the Token Later
If you decide you need to resize the tokens again later, just use the Move Tool (V). In the tool properties bar, make sure to check the Auto Select checkbox (which will allow you to click on any of the pixels of the icon to select it on the screen), set the pulldown option beside Auto Select to Layers (so it selects them by layer), and make sure Show Transform Controls is checked. Then just drag the corner in and out to adjust. Hold Shift to maintain the proportions.
In this dungeon, I just add some wooden doors and a treasure chest, and the basic dungeon is finished!
Stay tuned for future articles on creating a livable dungeon for your monsters and adventurers.
Hello adventurers! Thanks for stopping by.
I’m Mike Bielaczyc, an artist, creator of the popular SagaBorn RPG, and a founding sibling of the largest elf ear company in the USA (for real, check it out here).
I hope to not only connect with people who enjoy my work and can use it in their own adventures, but to create a lasting community in the process.
When you subscribe to my Patreon, you not only get every upcoming map I create, but you also gain access to our entire back catalog!
Last 3 Maps:
- The Forge Tavern Map
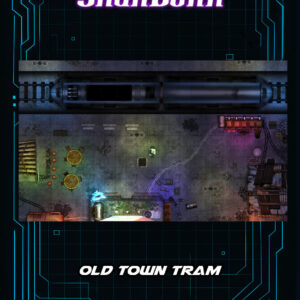
- Cyberpunk Map – Old Town Tram Station
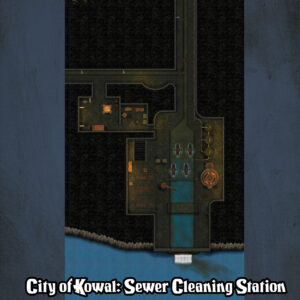
- Map – City of Kowal: Sewer Treatment Center